
If you are looking for the Flaunit It Friday's Hello Kitty Blog Hop click HERE
Hi everyone! Several of you guys left comments asking for the details on how to make the note pad cover. It is super simple and I hope you can understand my instructions below. We got a new video camera and I am going to work on figuring out how to edit so I can hopefully try doing a couple of videos in the near future. This is not my original idea. I think I first saw this done with post it notes over at Kerry's Paper Crafts.
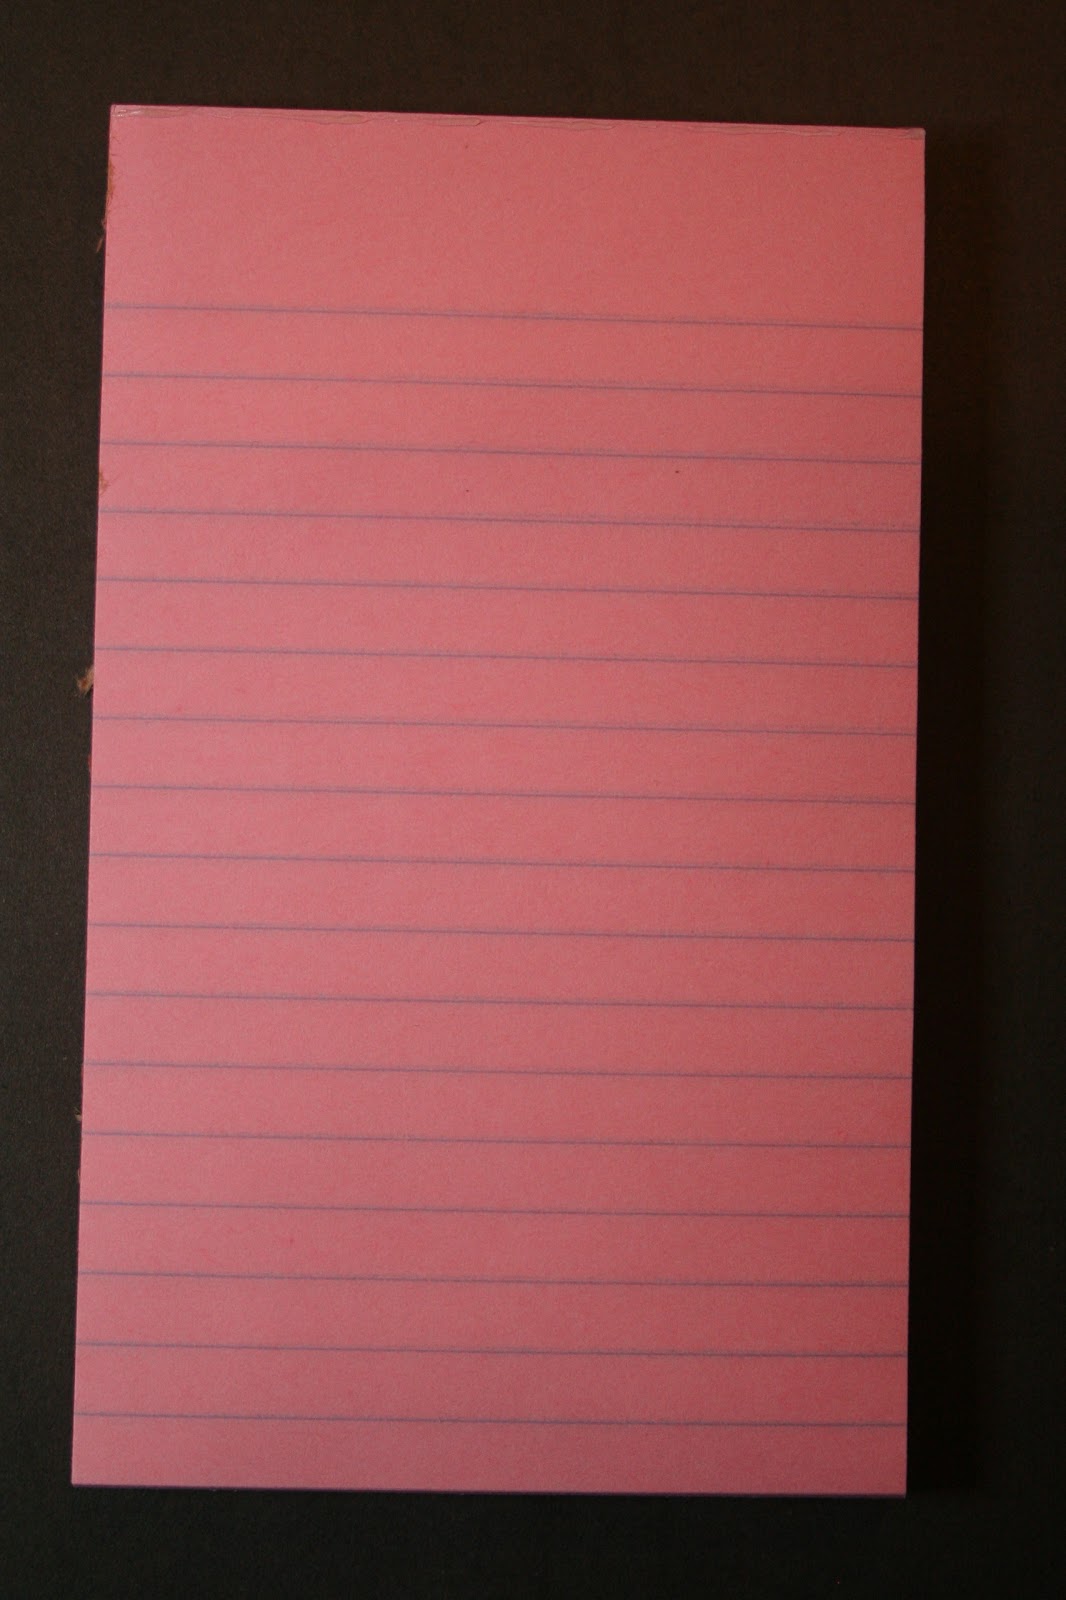
I started with these 5'h x 3"w note pads from Dollar Tree.
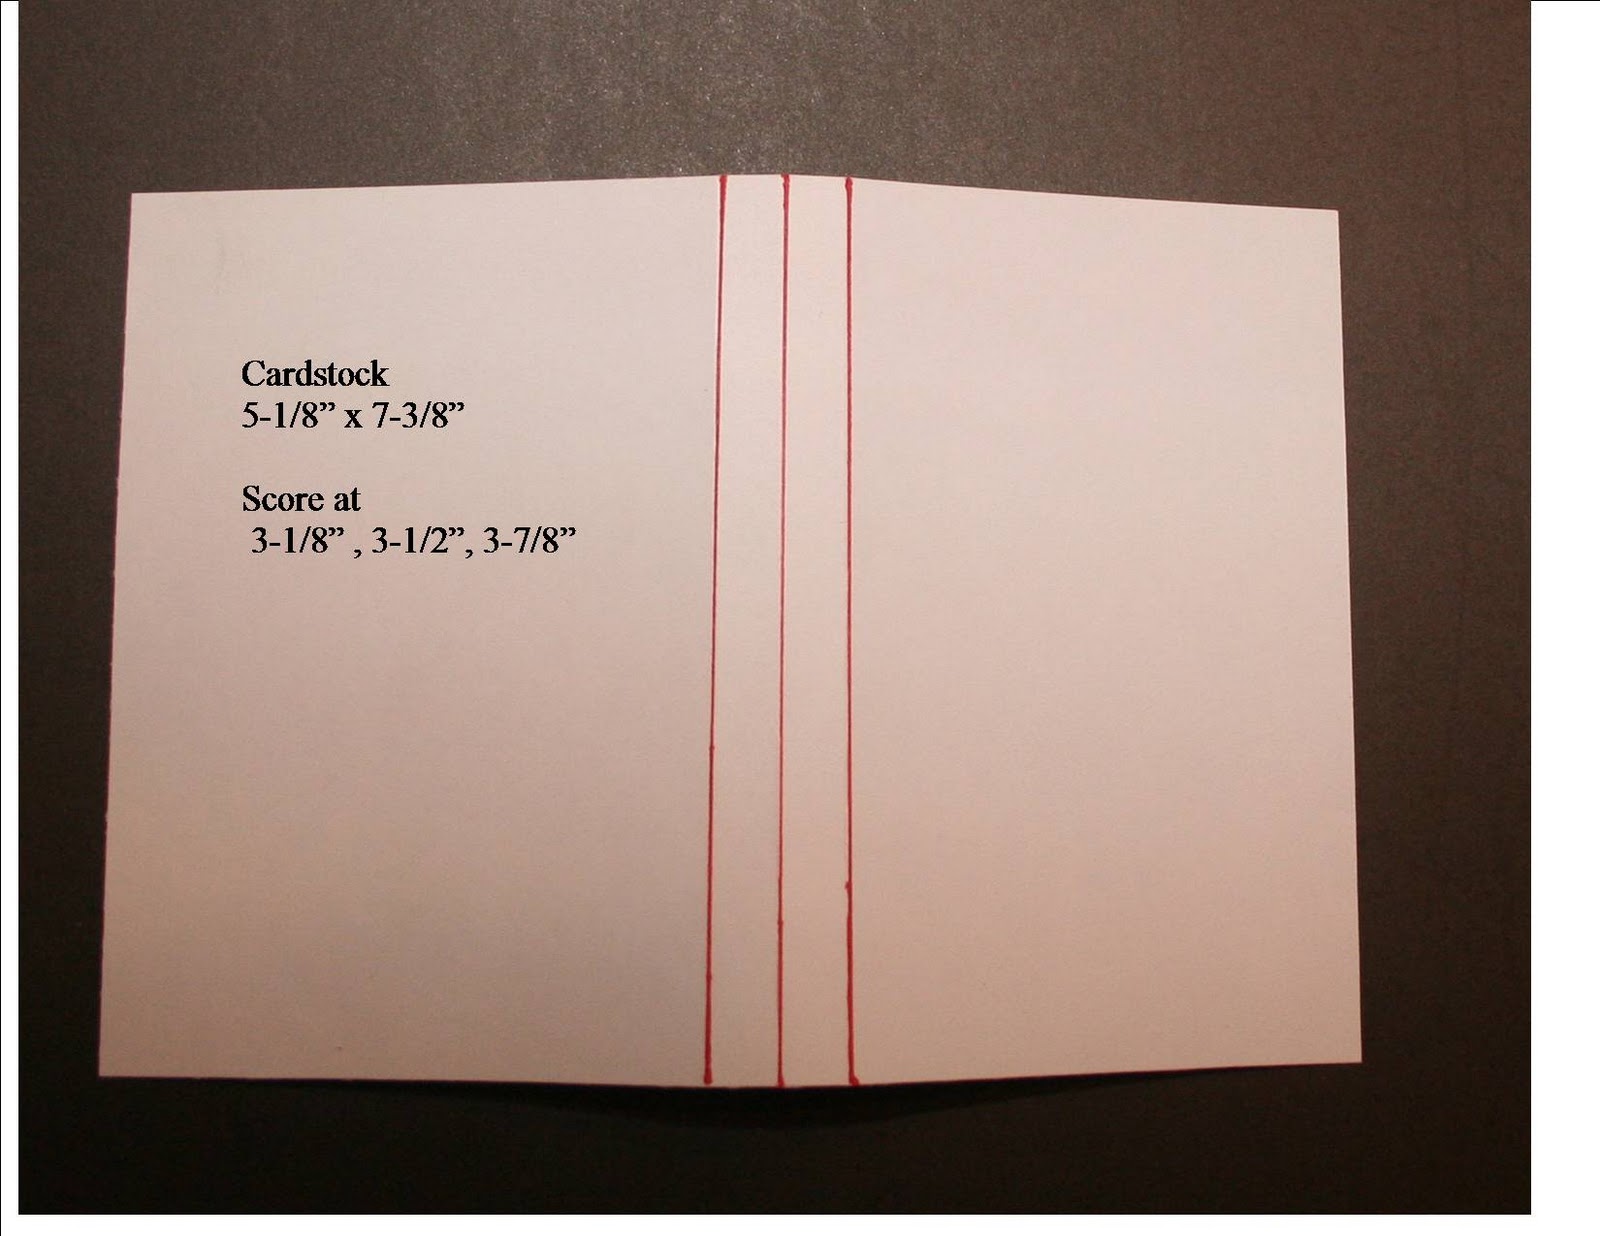
Cut a piece of 5-1/8" x 7-3/8" w. Score the cardstock along the 7-3/8" side at 3-1/8, 3-1/2, & 3-7/8.
I marked the score lines in red so you can see them better.

With the 3-1/8" portion facing up, fold the cover on the center score line and make two cuts to the next score line about 1/2" apart. This creates the pencil holder.

Now fold the cover over on the far left score line and you will add double sided tape or your ATG adhesive on the inside, skipping over the area that you cut so that it will pop up for your pencil.

The last step is to adhere your note pad down to the inside and decorate the front. You can do this same thing with a post it note pad. The only dimension change would be the height of the cardstock
would be 3-1/8. All the other measurements remain the same. You can find these mini pencils at the dollar store and I have found mini gel pens at Party City in the goodie bag bins for .25 each.

I gave the post it note size as Teacher's Gifts last year and they loved them. Everyone can alway use an extra note pad. Let me know if something is not clear or if you have any other questions. Also, I have been asked a couple of times how I got my comments to be numbered. I don't have any idea....my blog designer did it for me but I do know there are a couple of tutuorials on the web that tell you how. I used Laura Jane Designs for my blog makeover. She has great prices and is so sweet. You can find a link to her site by scrolling down to the bottom.

Corri, Thanks for sharing the instructions! I will have to try some of these. My mum would like one in her purse - and what a great teachers gift :)
ReplyDeletemichelle
Yeah! Oh My Funness! I can't wait to make these! Thanks! I'm printing out these instructions.
ReplyDeleteOMG i meet you at michaels on saturday. when i came home i looked up your blog to find out i'm already a follower. thanks for sharing such great ideas.
ReplyDeletehttp://craftywithjoann.blogspot.com
You are the best! Thank you so very much for posting this!
ReplyDeleteCan you guess what I am about to do?
I already clean up my craft room and it is ready for this!
Hugs,
so cute!!! Thanks for the tutorial! -Sam :-)
ReplyDelete