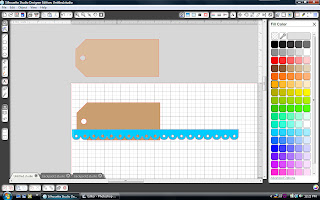
Hi everyone! I have a simple tutorial for you today using a new tool I recently discovered in Silhouette Studio. It's the crop feature and it's super easy to do but very useful. I used it to make a quick and easy name tag for my daughter's backpack.
First, open this tag and border on your mat. I resized the tag to 5"w. Make a duplicate of your tag.
Line the the border up on top of your tag.
Select both items and then go to the Modify menu in the upper left of your screen.
Click on Crop.
It trims your border to fit perfectly along the edge of your tag.
I typed Olivia using Lori's Happy Font and embellished my tag with this butterfly and a sticker from the
Here and Now Collection that Lori designed for Echo Park.
I laminated it to make it more durable....so it was a little hard to photograph but it turned out very cute!
I will be using the crop feature a lot. It's perfect for trimming bordesr for cards that have an unusual shape. I also think it would be cute to trim a grass border to fit perfectly along the edge of an Easter egg.


Great tutorial. I hadn't tried that tool yet. LOVE it. Fantastic tag, too.
ReplyDeleteBe blessed, Beckie
Just B Creative Crazy Blog
Sparkly Sweet Craft Notions Blog
Sparkly Sweet Craft Notions Store
Too cute. Thanks for the tutorial.
ReplyDeleteHave a creative day.
Hugs Nana
♥ My Crafting Channel ♥
♥ 2 Creative Chicks ♥
♥ Silhouette Challenges ♥
Awww...So sweet! :)
ReplyDelete