


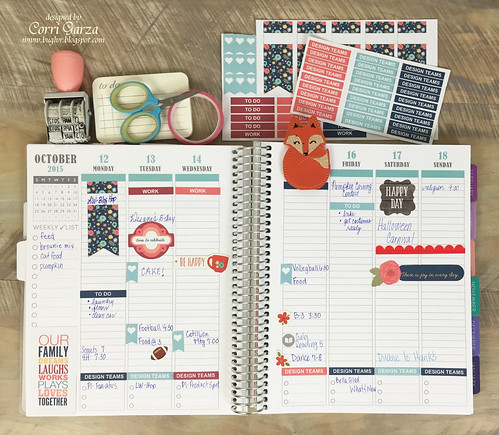
For my project today, I used Lori's cut files and some of her digital papers to create stickers for my planner. I used two different techniques to create them. This is what they look like.

First, I filled some cute banner shapes with pattern papers from the Story of Family Collection. This is really easy to do. I opened both my Silhouette Software and the folder that holds my pattern paper.

Once you have your shaped scaled to the size that works for your planner, simply drag the pattern paper on top of the shape to fill it. I wanted to have a white area to write on so I used the rectangle tool to draw a rectangle and placed it on top of my banner.
The other technique I used was to create a cut file from some of pgn elements in Lori's digital paper collections.

To do this, simple drag the element you want to turn into a sticker onto your mat. Resize it to fit your planner then click on the trace tool at the top of the screen. Click select trace area and draw a square around your design. Deselect the high pass filter and adjust the theshold slider until your element is almost solid yellow. Finally, click trace outer edge. Now you can print your stickers and then cut them out with your Cameo.
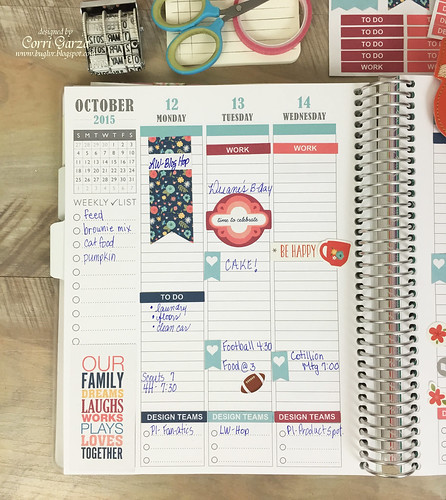
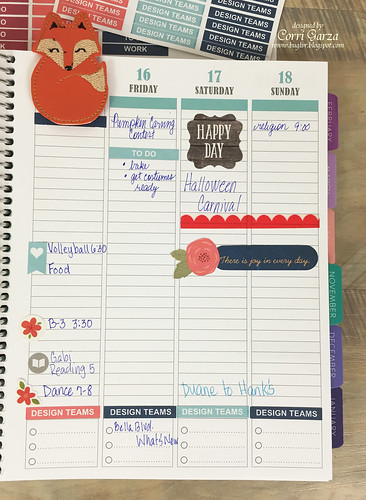
Here's how my planner looks all decorated:
Here's the left side...
And the right....
You can find all of Lori's products on sale. Her digital products are on sale today only over at Snap Click Supply.

SVG files are on sale now through October 18th. It's a great time to pick up some of the new 3d files!

Giveaway!

Your next stop is Mendi! Thanks so much for stopping by!
great project
ReplyDeleteLove this Corri! The papers you used were perfect and the little fox - LOVE! Nice work!
ReplyDeleteWhat a great idea! I love how they turned out! :)
ReplyDeleteLove this idea and thanks for all the detail! I would love to do this for my Grandkids school planners!
ReplyDeleteGreat way to use the cut files as well as the awesome digital images! I love how they look in your planner!! Thanks so much for sharing!
ReplyDeleteWow!!! Great tutorial for planner! Your planner looks fantastic!
ReplyDelete